Month: April 2016

How Long Will It Take to Receive My Blue Cart? Part 1

Now that I am all moved in, it is time to get the City of Chicago’s Blue Cart Residential Recycling Program in my multi-unit building! Here is the timeline on how that went down so far.

Sunday April 3rd, 2016

Emailed my Alderman’s office asking how to get a recycling tote for my building. It didn’t explicitly say on their website how to go about requiring one, so I just emailed the office. This is what it says in regard to recycling:

“The Blue Cart program provides bi-weekly recycling services to single family homes and multi-unit buildings with four or fewer units.  By recycling regularly, you can help reduce the need for landfills, lower disposal costs, reduce pollution and conserve natural resources, such as timber, water and minerals.”

Monday April 4th, 2016

Received a response from a City Council staff member for my Ward asking how many units there are in my building. So I quickly responded with an answer of 4 units.

Amazingly it only took 8 minutes to get another response with the following information:

The good news: the request will be processed immediately

The bad news: it can take at least 5 weeks to receive a blue cart and  I was advised to “be patient.”

Tuesday April 5th, 2016

Obviously have not heard a response yet, but the recycling pile is growing….

Sunday April 10th, 2016

At this point the recycling has to go somewhere and I refuse to throw it out. Therefore it is now in my car until I take it to one of the recycling dumpsters.

Wednesday April 13th, 2016

The big boxes to recycle are still in my car. I have yet to make it to a recycling dumpster, but garbage/recycling day was today so I stealthily brought my recycling bin from the apartment down and dumped it in a neighbor’s blue cart that was out for pick up.

Wednesday April 20th, 2016

Finally brought the big boxes to the residential recycling drop off center at the Peggy Notebaert Nature Museum. There are a number of these around Chicago and you can learn more about where they are here.

recycling drop off

Monday April 25th, 2016

Still nothing. Now I am wondering if I get some type of email notifying me that my blue cart has been delivered, or just hope that it shows up one day next to our garbage cans?

I will keep you filled in! Look out for Part 2!

Using What We Already Have

After moving in, K still had a perfectly good IKEA HEMNES mirror that we really did not know what to do with. We were not using his HEMNES dresser anymore and already had a mirror in the bedroom. So, for the past two weeks it has just been leaning up against the wall, getting in the way of everything.

It so happens that the mirror that came with our apartment’s bathroom was in really bad shape (so bad that I am not even going to post a picture of it) and we had planned on replacing it since we moved in. I had casually perused bathroom mirrors on the internet, but really we already had a perfect mirror leaning against the wall all along.

Since the bathroom is white on white on white, the black frame was much too dark. To go with the beachy vibe of our shower curtain and bath rug, we chose to paint it a blue ocean breeze.

mirror before

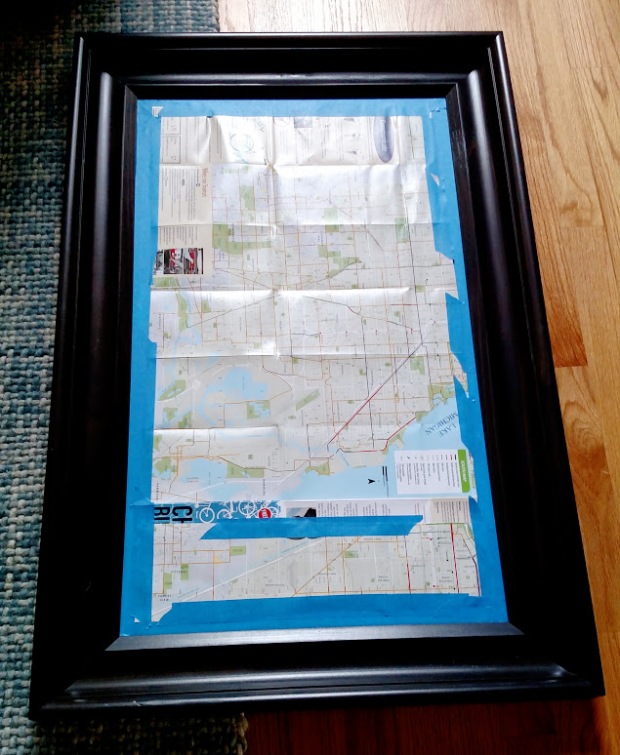
This whole project was finished in just over 24 hours. Last night I taped up the mirror, using an outdated bike lane map to cover it up.

Fun Fact: You cannot buy spray paint in the City of Chicago

Over the weekend, when we asked the employee at Home Depot where the spray paint was, her response was “Anywhere outside Chicago.” At first I thought she was joking, but then we did some research and it is true!  It is an attempt to curb graffiti. With no intent but to fix up our mirror, K picked some up when he was out in the suburbs and I got started on the project last night.

I craftily brought the mirror outside on to our fire escape landing and propped it on our compost bucket (serving double duty!) Since it is not a big outdoor space, it took some maneuvering to get all sides and angles of the frame. There were multiple times I probably could have tumbled down the stairs….all in the name of upcycling.

The frame dried really quickly because I used KRYLON COVERMAXX . It dries in 10 minutes and can be handled in 1 hour! After a while of leaving outside and periodically checking to make sure a pigeon did not poop on it, I brought it inside to fully dry overnight.

Some quick touch ups in the morning and it was ready to go! I waited a full 24 hours before actually handling and hanging the mirror to ensure it was dry.

mirror drying

There was already a screw in the bathroom wall to hang the previous mirror on so we decided to wire the back of the mirror instead of screwing more holes in the wall. I drilled two small screws into the back of the frame and strung picture hanging wire between them.

And now for $3, our bathroom looks a bit more cool, and we used something we already had. 🙂

mirror finished


How To: Compost in Your Apartment

I have never composted before and I am so excited to start!

I originally met Farmer Jon at Environmental Industry Night in January and when he told me about what he did, I was amazed. Not only does he personally collect composting from around the City, but he does it BY BICYCLE! How cool is that!?

Since I have a bit of a cycling background, I was all about supporting his endeavor and knew when I moved to the City this was something I wanted to try.

After being in the apartment for 4 days, I signed up for Healthy Soil Compost and received my 5-gallon collection container the very next day. While we don’t have any green space, we do have a fire escape, and that is where I will be keeping our composting.

I signed up for pick up once a month, which comes out to only $0.50 a day. Not too shabby.

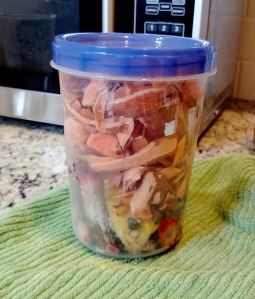
For the time being, I am using a plastic screw top container to hold my food scraps until it becomes full, which is a lot faster than I thought it would be. The container does not smell (yet) unless you actually stick your nose in the container, which I advise you do not do.

It was surprising how quickly we filled up the compost bucket, which is sitting out on my fire escape landing currently. When the kitchen container is full, I pop open the door and dump the contents inside!

We are only 2 weeks in and so far we have collected:

  • carrot peels
  • banana peels
  • apple cores
  • green pepper insides
  • egg shells
  • flowers
  • asparagus ends
  • bread crusts
  • potato skins
  • onion skins
  • lettuce/spinach

Healthy Soil Compost provides a handy guideline for what they can and cannot take. If I am unsure about something, I always check it first.

I always have to remember that you can compost egg shells, but not eggs!

Read more about Healthy Soil Compost in the press here:

How To: Completely Wing A Gallery Wall

I have never hung anything like a gallery wall before, but since we have so many Indiana University related framed pictures, we figured it would be best to clump them all together in one space. After a quick (2 minute) overview of “gallery wall tips” on Pinterest, I set to work doing a mock up of what the wall would look like.

Materials Needed:

  • Scissors
  • Paper
  • Pen/marker
  • Tape
  • Nails/picture hanging supplies
  • Hammer
  • Level
  • Measuring tape

1.) Find Some Paper and Do Some Cutting

Since K had just gone grocery shopping, I opted to use the paper bags he just brought home. I traced each frame, cut it out, and labeled it.

2.) Figure Out Where They are Going to Go

First I played with their locations on the floor a bit before taping them on the wall. Since we lacked painter’s tape,  I used regular scotch tape and nothing happened to the paint.  I started with the biggest pictures and then worked around them with the smaller ones. I made sure to focus on which color the frames were so all of my black frames did not end up in one corner.

gallery wall before

3.) Do Some Measuring And Take A Step Back

Using my handy dandy measuring tape, I attempted to keep 3 inches between each frame so that all the spacing was the same. It took a couple tries of moving pieces around and each time you moved one, you had to adjust them all! We looked at it from across the room and made sure we liked where everything was before moving on.

4. Hang Pictures (Repeat this step over and over)

I chose to hang the largest pieces first before moving on to the smaller ones. After hanging one picture, I had to make sure the frame was decently level before measuring and hanging the next one. If not, the whole thing could end up off.

Here is the final product! It is not perfect, but I do not care. Looks good from afar to me!

gallery wall after


My Favorites: Second Hand Things

I pride myself in having filled probably 75% of our apartment with second-hand things. I don’t really see the point in buying something brand new when there are plenty of other options out there.

There was a time when I was living in DC where my roommate moved out and took all the living room furniture with her. I was left to furnish it myself, and since I was on a budget, it all came from either craigslist or the dumpster behind my apartment building. I traveled around the District picking up a kitchen table and chairs, coffee table, couch, arm chair, and end table. All without a car.I ended up furnishing the entire place for under $250.

Now that I am on to my next apartment, it is no different. I love having pieces that are old, tell a story, and remind me of how I acquired them. As much as I love Home Goods, I would much rather have knick knacks that have a meaning/purpose.

These are my favorites:

Our copper bottom pots and pans were a wedding gift for my grandma and grandpa in 1953 and still going strong! My cousin used them for a while after college and now I have them! A little copper cleaner and they still look and work great.

copper pans

The metal cabinet was found while scrounging through a family friend’s warehouse that needed to be cleaned out. Read more about its transformation here.

cabinet done

Our couch was originally my aunt and uncle’s. Their labradoodle, Murphy, had a specific spot he would sit in and you can definitely see that spot in the leather.

couch

The blue end table was bought on craigslist in DC. I took the metro out to a part of the District I wasn’t familiar with, picked it up and walked a couple blocks with it. Once I found a taxi, I shoved it in the trunk and headed home with my new find. It needs a new coat of paint and then will look brand new!

end table

These pillows came with the couch I found on craigslist in DC and they were super ugly, but I did not want to get rid of them so I just got crafty. Can you tell I was homesick for the Midwest?

pillows

The bedroom set was my other grandmother’s set that my dad had refinished. Since she has passed away, it is a nice memory of her and makes my mom happy that it is being used. It is also quite in style now!

dresser

A bowling pin my parents picked up at the Randolph Street Market because they thought I would like it and an IU 1976 NCAA Champs 7Up bottle I found at a garage sale in Indiana. Go Hoosiers!

bowling pin and bottle

Rival Ice-O-Matic ice crusher that was in my grandmother’s basement and thought was super cool looking.

ice o matic

Vintage Coleman cooler we searched for and found at the Elkhorn Antique Flea Market. Right now it is being used for storage.

cooler


How To: Combine 2 People’s Stuff in 750 sq. ft.

Moving day has come and gone!

For the most part, the apartment looks presentable, except that we have a few piles of things we are not sure where to put yet. In addition to those piles, we also have a recycling pile and a donation pile. Our building does not have recycling yet (there will be a post about this later), so I am figuring out what to do with it until then.

With the two of us having lived alone before, we had a lot of the same things, and we did not need to double up on them in our 750 square foot apartment. So some things had to go!

Here is how we did it:

  1. I pulled all my kitchen stuff out of the attic before we moved and we went through it all together, marking what we already had and what we needed. If we had doubles of something, we decided whose was in better condition and that one was kept. The one in poorer condition was to be donated.
  2. Better quality was pretty much how we decided a lot of things. I had a better couch, so K’s was sold on Craigslist. I also had a better bedroom set than K’s wobbly IKEA dresser. (That will be getting the boot soon)
  3. Since our apartment is pretty small we knew that certain larger items would not fit. These were donated or left in storage.
  4. When I moved back from DC, I sold all of my furniture and left it there. Thank goodness I did. We definitely didn’t need even more duplicates than we already had. I even sold a few pieces that I had pulled out of a dumpster, so I made a profit off those!
  5. If something didn’t jive with both of us or bring at least one of us joy, then it did not get to come with us.

There are a couple of things that we still have too many of though and that includes:

  1. Pyrex
  2. Candles
  3. Pillows
  4. Blankets
  5. Books

I personally think those are great things to have too many of though! Overall, we still have plenty of space to you know, live. So it is all good. 🙂

Upcycle: Metal Cabinet

Last year, I acquired this metal work cabinet from a family friend who was cleaning out their warehouse. When I saw it, I knew it could be something awesome again, so I snatched it up. It has been sitting in my parent’s attic until I had a place of my own, and now I do!

caibinet1The First Step: Initial Clean Up

It was DIRTY! I hosed it down with water and mild soap to get off the rust, grime, glue, and who knows what else was on this thing. I had to use a knife blade to get off drips of wax and then had to work on something sticky after that. I even peeled off a “Government Issued” sticker.

Then came the surprise! My dad walked in and noticed that this cabinet also had a pull out tray that could be used as additional work space. He thus became obsessed with trying to get it out, but it was stuck due to a combination of felty stuff and black goo. cabinet3

The Second Step: Even More Cleaning

With the discovery of this new part of the cabinet that needed some extra attention, the cleaning stage got a bit more intense. This involved scraping, using a solvent, and lots of scrubbing to get off.

cabinet2

Closer look at said surprise

Third Step: Rust Removal

Since I planned on spray painting, I used some steel wool to go over the rust spots. After they were smoothed, I used a rag to wipe off any access rust.

Fourth Step: Time to Paint!

When I get started on projects, I tend to want to get them done as soon as possible with disregard as to the actual best way to do it. To cut down on spray painting time, I picked a spray paint that had the primer included. I chose RUST-OLEUM Universal Hammered Paint & Primer In One in silver.

The hammered look helps cover the many imperfections that were on the cabinet.

I left plenty of time for the paint to dry before moving the cabinet so I could do the bottom. It was quite rusty under there too! After several days of the painting and drying cycle, it was finished!

cabinet4

Side by side of the painting door on the left and the original on the right

Fifth Step: Re-Attach Hardware and Admire Your Work!

The handles were something I originally thought I was going to paint another color, but once I put them back on, I fell in love! They looked fantastic and I would not change them.

cabinet done

The Final Product!

All in all this project cost about $16 for two cans of spray paint. The most (wo)man hours went to cleaning and then painting did not take long at all.