upcycle

A Secondhand Nursery

One thing I did not want to do once we transformed our guest room into a nursery was buy a whole bunch of new furniture.

The transformation process was pretty slow going because we had to move a ton of stuff out of the guest room to make way for baby.

We utilized Facebook Marketplace and Craigslist to sell a lot of the bigger items including the desk, some lamps, pillows, and other odds and ends. I also paid someone to recycle our mattress and box spring.

As things have left, we were able to start focusing on the items we needed and a lot of the main components of our nursery ended up being secondhand, coming from family members, strangers, flea markets, and online stores.

Here is how we ended up furnishing our nursery with pre-loved items:

The Crib

Our baby’s crib came from my cousin and it was previously another baby’s crib before that! Don’t worry. The issue with using a secondhand cribs is not knowing where the crib came from or if it’s super old with a drop down side. We know where it is from and no drop down side, so we are good to go!

IMG_20200520_093918

The Dresser/Changing Table

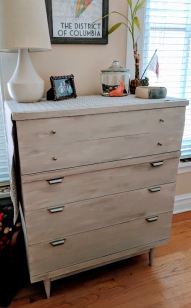
I scoured Facebook Marketplace and Craigslist for a vintage midcentury modern lowboy dresser to use as a changing table. The goal was to find a piece of furniture that could be used as a regular old dresser down the road and not look like a standard changing table. I ended up finding this one on Facebook Marketplace and am so happy with it!

IMG_20200520_095735

The Rocking Chair

This rocking chair was actually my mom’s and she rocked me in it as a baby. Growing up, the rocking chair was in our computer room and I spent many hours talking on the phone sitting in it. Now I get to rock my own baby in this chair!

Additionally, the original cushion on this chair definitely did not go with the nursery theme, but luckily my mother-in-law was able to reupholster it!

The tallboy dresser behind the rocking chair is also secondhand, but we have had it for a number of years and it was bought on Craigslist. Luckily it matches pretty well!

IMG_20200520_094019

The Clothes Tree

This kiddie sized clothes tree has also been around the block! It was originally in my mom’s bedroom as a child and eventually was in mine. It has been painted a number of times including yellow, pink, and now grey! It was already grey before we added it to the nursery, so we didn’t have to paint it again!

IMG_20200520_093947

The Vintage Posters

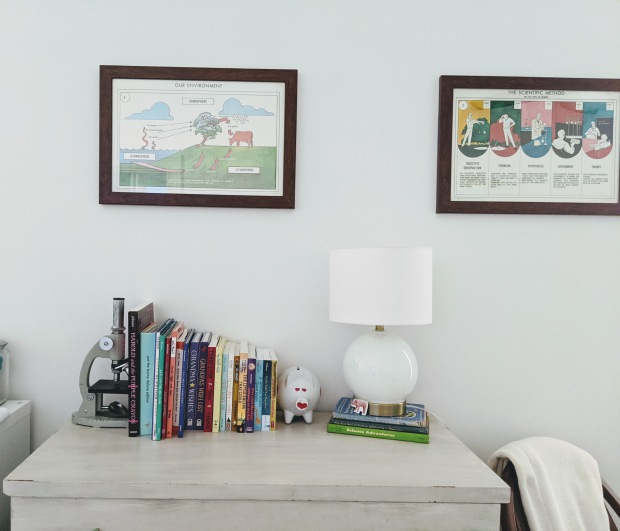
As for decor, our theme is loosely “vintage science classroom,” and these vintage science posters were the inspiration. I found these at the Grayslake Flea Market and bought them from a retired high school science teacher who taught in the 70’s.

This slideshow requires JavaScript.

The Vintage Map

The pull down geographical classroom map was the second piece we collected in the theme from the Elkhorn Flea Market. It sat in our closet for a few years just waiting for a baby to come along.

IMG_20200520_095804

The Vintage Children’s Books and Microscope

To round out the theme, I found some smaller pieces for the tallboy dresser.
IMG_20200520_100229

The vintage children science books are from the 50’s and 60’s and I found them on Etsy.

IMG_20200520_094037

Also from Etsy, I picked up a vintage microscope to use as a bookend.

IMG_20200520_100245

And there you have it! We do have another storage piece of furniture in the room with fabric bins (not pictured) and that came from Facebook Marketplace.

Otherwise, a majority of the rest of the items came from Target including both table lamps, the rug, side table, ottoman pouf and blackout curtains.

Not bad? I think we did a pretty good job of keeping it secondhand. What do you think?


The Paralysis of Getting Rid of Things Correctly

We are currently clearing out our guest room to make way for baby and it has brought up a phenomenon that I don’t think I am the only one to have encountered.

It is the fear of disposing of/getting rid of items correctly.

If it were up to K, he would either throw everything out or haul it all to Goodwill. No questioning whatsoever.

I can’t handle that.

From the odd things like the collection of free fridge magnets we have acquired from our insurance agent to half-used Christmas candles to the normal stuff we just no longer had a use for, I wanted to make sure each went to the right place once they left our home.

For the most part, the reason we still had all of these odd things was that I was waiting to figure out what to do with them. Sometimes I figured it out and sometimes I didn’t, but they stayed in our home longer than necessary and it was causing me a lot of stress as we wait for the baby’s arrival.

I figured out what to do with our mattress and got it recycled. I used Facebook Marketplace and my local Buy Nothing group to get items into the hands of people who want and need them for free. Those half-used Christmas candles got picked up by someone in that group! So did old Amazon Alexas, a Roku, underbed storage containers, an old backpack, an old crockpot, a desk lamp, a fruit bowl, headbands, two purses, an old Fitbit, tools, and a bunch of personal care products.


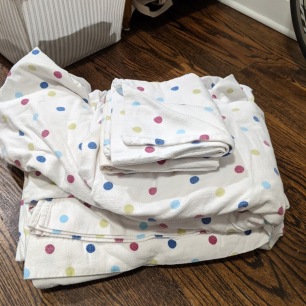
Utilizing the Buy Nothing Groups meant that my stuff wasn’t automatically sent to the giant truck that sits outside the Salvation Army to be sorted and possibly purchased down the road. My sheets, bed skirt, and duvet cover immediately got a second life, along with many other items!

We did have to institute a rule that if things aren’t sold or picked up within 2 weeks of posting, the items will be donated. That way we could keep the flow of removing items and they weren’t just sitting around until I went crazy.

There were also things that didn’t get figured out and I had to let go of it. That collection of fridge magnets needed to go and I had to begrudgingly toss them in the trash.

It has been hard and has taken a bit longer than necessary, but I am glad I took the time to make sure things went to a good home.


An Attempt at Beeswax Wraps

Don’t worry. All my posts won’t be about pregnancy and babies from now on.

I finally found the energy and time to tackle a DIY I have been wanting to do. I own a couple pieces of beeswrap as a replacement for plastic cling wrap, but they have been around for a while and are starting to lose their ability to cling to a surface.

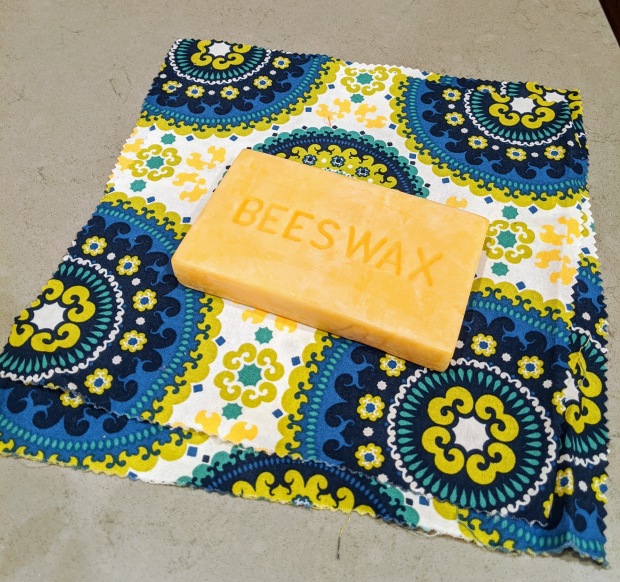
While at a craft fair back in November, there was a booth selling local honey and beeswax products, including a nice brick of beeswax.

IMG_20200119_171916

So I bought it, thinking I would try my hand at creating my own.

At first, I was going to run over to Michael’s or Jo-Anne Fabrics and pick up some fabric, but then I remembered The WasteShed here in Chicago. They sell repurposed arts and crafts materials! So I headed over there and scrounged through their fabric scrap bin, leaving with a bunch of options for the low, low price of $2.75.

IMG_20200119_172001

The directions I followed for these beeswax wraps came from Good Housekeeping. I was looking for a tutorial that was easy and did not involve a lot of weird ingredients. For instance, a couple required pine resin and some other stuff you have to find at a specialty store or order. Neah.

So here is what I did:

1.) Wash, Dry, and Iron Your Fabric

Good Housekeeping recommended using 100% cotton, which I was not able to know if I fully achieved since I bought fabric scraps, but I figured I would give it a shot and see what happened.

After washing and drying the fabric pieces, I ended up ironing them because some were pretty crumpled. Otherwise, I would not have done this step, I hate ironing…

2.) Cut Your Fabric

I used pinking shears to keep the ends from fraying, but I am sure you can hem them also. I didn’t really adhere to a specific size and just kind of eyeballed what looked good. You can definitely see that I cannot cut straight either!

3.) Grab A Baking Sheet and Parchment Paper

GH recommends placing the printed side of the fabric down.

IMG_20200119_171925

4.) Cover Fabric in Beeswax

This is where I started to stray from the GH directions because I did not buy beeswax pellets, which apparently are a thing. I had a brick of beeswax that needed to be grated, which took quite some effort and I would not recommend it.

So I grated and grated and grated for what felt like forever and covered the fabric.

IMG_20200119_172447

5.) Pop It in The Oven

It only takes about 4 minutes to melt and then you are supposed to brush the wax around on the fabric, but it seemed I did not use enough wax and there wasn’t any to spread. There also were a lot of spots where I could see that the wax was missing, including the edges.

So I tried again.

IMG_20200119_173917

This time I put my muscles to work and grated a more ample supply of beeswax and made sure to get up close to the edges. This seemed to work better this time around.

6.) Let It Dry

The fabric pieces were pretty cool to the touch once I took them out and tried to brush the wax around. I was able to pick them up and wave them around a bit to initially dry.

Afterwards, I folded the fabric over a wire hanger and hung it on the shower curtain rod to fully dry. This only took a few minutes.

7. Enjoy?

After grating enough wax for three wraps, I was pretty tired, so I decided to give it a break. I am also curious if these will work, so I didn’t want to spend all this time and effort making a bunch and it turns out they didn’t do anything.

They feel right and they look right, but I want to test them out for a bit.

IMG_20200120_085738

Hopefully, they do the job! I will keep you update.

Have you ever made DIY beeswax wraps? Any recommendations?

Salvation Army Vs. Goodwill

When we clean out our closets, move, are making way for new things, or are deciding which items in our lives “spark joy,” there is bound to become a donation bag.

It may be the giveaway pile or donate box, whatever you call it, it has to go somewhere.

The old books you’ve already read can be handed off to a friend looking for a new summer read, sold on Craigslist, or posted on the many Buy Nothing Project groups for someone else to enjoy.

More often than not though, with our busy lives, it becomes just too much work to try and find a new home for your items and coordinate a time to have it picked up. So the items get dropped off at a donation center because you want the stuff out of your house NOW.

Recently, I was asked which was a better place to donate your pre-loved items, Goodwill or Salvation Army? I didn’t have a clear answer, so obviously this became a good blog topic.

Salvation Army

According to their mission statement, “The Salvation Army, an international movement, is an evangelical part of the universal Christian Church. Its message is based on the Bible. Its ministry is motivated by the love of God. Its mission is to preach the gospel of Jesus Christ and to meet human needs in His name without discrimination.

They work to meet all sorts of human needs from helping disaster survivors and stopping domestic abuse, to combating addiction and assisting the unemployed. Learn more about what they do here.

Donating clothing and goods to The Salvation Army helps fund addiction rehabilitation programs. You can donate at their Family Stores and drop-off locations or schedule a free pickup. We had The Salvation Army come to pick up our couch once. It was nice that they could take care of that.

According to CNN, the Salvation Army spends 82% of donations on aid and you can check out Salvation Army’s sustainable development goals here.

Goodwill Industries International

Goodwill is a nonpartisan nonprofit organization whose mission is “to enhance the dignity and quality of life of individuals and families by strengthening communities, eliminating barriers to opportunity, and helping people in need reach their full potential through learning and the power of work.” They seek to help all job seekers and in 2017, Goodwill helped more than 288,000 people find employment.

Donating your items to Goodwill helps create job opportunities by funding job training and services and they also claim it keeps billions of pounds of textiles and clothing from meeting their end in the landfill. You can calculate the impact of your donation on their website which is pretty cool. For instance, if I donate 5 shirts, that provides 31 minutes of on-the-job training.

But is that what really happens? This Huffington Post article does a good job of explaining what happens to your clothes when you drop them off at Goodwill. In reality, after the good stuff has been picked out and the unusable has become rags, the rest gets shipped overseas. I was not able to find anything that directly explained what they did with stuff when it didn’t sell, but here is a blog about their sustainability initiative.

What’s the Verdict?

It is up to you! Both are keeping materials from the landfill and helping others in the process. I am sure there are parts of each that some may not agree with, but both are better options than tossing your clothes in the garbage. To avoid having to go through all your clothes and donating every few months, be conscious of your purchases and only buy what you actually need, buy secondhand, or attend a clothing swap.

What are your thoughts?

New Homes for Old Pillows Hard to Come By

Being that our household includes two later twenty-somethings who still have a lot of things from college and from our parents, we have acquired some items from family members that have an unidentifiable and questionable age.

While there is nothing wrong with that for pots/pans, or baking sheets, it’s helpful to know how long someone had been sleeping on that pillow you found in the closet at your parents.

I was recently waking up with a sore neck, which I attributed to my pillow. So for Christmas, I was given a new one (#adultstatus).

But now I have an old pillow that I don’t know what to do with.

We already have at least 2 extra pillows lying around for when the occasional guest stays over, and we don’t have the room to be piling up pillows.

I am not going to make it into a dog bed (don’t have a dog), or craft it into throw pillows (no room for those), and donation centers don’t take used pillows.

So what is a person supposed to do?

I wanted the pillow to avoid a landfill end and was intrigued by it keeping a shelter pet nice and cozy. So, I checked almost every Chicago animal shelter’s website to see if they were accepting old pillows.

None of them do, but many took sheets, blankets, towels, and comforters, which is very good to know since we will be getting all new versions of those when K and I get married.

Here are the Chicago animal shelters that take various old textiles, but not pillows:

So I have a home for all of that stuff, but not my delipidated pillow. Now what?

Since we don’t have a lot of seating in our place, I am thinking that I might get some fabric and make a nice floor pillow with the stuffing like this one here.

Otherwise, there are plenty of other options for what to do with sad pillows:

Twist Ties to Avoid Tangles

I have noticed retailers are selling these things that keep your headphones from getting tangled. They are especially being pushed on gift guides this year as stocking stuffers.

That’s cool and all, but we don’t need to be sold another product.

Open your kitchen drawer.

Use what you have.

headphones

I have a TON of twist ties laying around and I use them for everything. Both sets of headphones are controlled by them and I use a stretched out hair tie to corral another charger cord.

The point here is, look around your house and see what you can use before adding one of those things to your shopping cart.


10 Most Overlooked Ways to Reduce Waste: Part 2

Welcome to Part 2!

If you missed Part 1, you can check that out here.

10 most overlooked ways to reduce waste.p2

Let’s get right into it.

#5 Vote with Your $$$

Every time you purchase something, you are contributing to its demand. This is simple economics.

Put your money towards products and companies that you believe in. If it is important to you that your items are produced using renewable energy, then support companies that do.

For instance, there is a fair trade shop just around the corner from our apartment and it is currently struggling, so after work today I popped in and used my dollars to buy wool dryer balls and Bee’s Wrap. My dollars did not just get me faster-drying clothes in the dryer but they made a statement that I support these kinds of shops and want them in my neighborhood.

Resources:

#6 Your Pantry and Fridge

Open your fridge.

Now open your pantry.

How much of the stuff in there is going to end up in the trash can/landfill? I am not just talking about food packaging and wrappers, but food waste too.

Keep this in mind when you are at the grocery store. I am not asking you to only shop in the bulk aisle of Whole Foods, but just start noticing.

Once you do it is hard to shake it.


CSA week 7

Joining a CSA helped us cut down on packaged produce, but sometimes we still received things in plastic. 


Resources for Cutting Back on Packaging:

#7 Wait it Out

When I find something that I want (not need), I bookmark it in my browser under a folder called “Things I Want to Buy.”

And then I leave it there for days, weeks, and months.

If I am still thinking about it long after I saved it, then I will consider it further. If not then it gets deleted, and to be honest, not many things have survived the “Things I Want to Buy” folder.

Basically, avoid impulse buys by having a waiting period for each item. You might find that you didn’t like it as much as you thought, or get home and realize you already have 5 black sweaters.

Resources:

#8 Put Some Effort into What You Already Have

Did something break? Then fix it.

Do your jeans have a hole in them? Sew them.

jean-patch2

The #8 overlooked way to create less waste is also known simply as taking care of your stuff! Wash and dry clothing according to the directions. Store equipment in the proper place. Use a coaster. Give your car regular maintenance. Fix the soles of your shoes when they have worn through.

Putting a little extra effort or elbow grease will make your stuff live a longer life.

Resources: 

#9 Buy Secondhand/Previously Loved

If you’ve followed this blog, you know that the majority of our furniture is secondhand. Everything pictured below has either come from Craigslist, a garage sale, or family/friends.

Not only is it way cheaper than buying anything new, but it keeps pieces out of the landfill. Beyond furniture, I do have some pieces of clothes that are secondhand, but the majority of my wardrobe is not. It is something I am working on.

Resources to get your secondhand shopping on:

#10 Don’t Give into Trends

The fashion world likes to tell us that we need new styles of clothing every few months. If it is not the 70’s bell sleeves, the chokers, or those “cold shoulder” shirts, it will be something else tomorrow. That way you can buy, buy, buy.

Don’t give into that crap. You don’t need any of it. I like to think that the clothes I purchase will be something I wear for a long time, so I stay away from trends and keep my closet pretty neutral.

Whatever the next ridiculous trend is, pass on it, and just wear your regular sweater that covers your shoulders with pride!

More Resources:


What else would you add to the list?

No Need for Pretty Wrapping Paper

You won’t find rolls of pretty wrapping paper in this house.

Wrapping paper and gift wrap for me include a pile of the Trib’s comics section.

the funnies

And a bag full of gift bags and tissue paper that was previously given to me.

bag of tissue paper

If I am handing you a present in a gift bag,  there is a 100% chance that it was given to me by someone else.

It is just silly to pay for something that is going to get ripped up and thrown out! Thus why I ranted about it last Christmas too.

gifting2

I get it. That cohesive look of presents wrapped in a glossy wrapping is Pinterest worthy.

But what I do not get is why anyone would throw out a perfectly good gift bag. They can be used infinitely until they rip!

I keep every single one I receive. And every one will be used again. And hopefully again (I am looking at you people I am giving gifts to! Do your duty!).

Buying vs. Renting Wedding Stuff

There comes a time in the wedding planning process where you realize how much all that fancy, cute stuff costs from the rental company.

This is a very contradictory situation for me. I want to save money, but I also don’t want to be wasteful.

There were two main pieces I wanted for the reception: cake stands and lanterns.

I checked around at some vintage rental companies and found that renting a single cake stand can range from $15-$50.

For one cake stand!


Nimble Well at Indie Wed

Nimble Well vintage jadeite, gold, and pink milk glass cake stands and vases, photo by Amanda Megan Miller.


Overall, it is cheaper to buy a couple cake stands, and then re-sell them as a set to another bride, all while keeping my favorite(s) for myself.

So, that’s what we did. We scoured garage sales and Homegoods to come up with our own set of vintage looking cake stands.

We did the same thing for the lanterns. The perfect lanterns happened to be at Target and all on sale as outdoor summer items were moved off the shelves to make way for fall. These lanterns were only on sale in stores and in small quantities, so there were plenty of trips to Targets all over the Chicagoland area. (Sorry you got roped into that dad!)

Once the wedding is over, I plan to keep these items in the wedding rotation by re-selling them to another frugal bride. There are a couple options for that:

Here is more information on where to buy and sell used wedding materials online.

The whole thing definitely is more work on our part, but I am okay with that. I know my purchases will be put to good use.


Hole Filled Jeans Become Housing Insulation

Earlier in the year, I tried fixing my favorite pair of jeans by patching them.

jean-patch17

It worked for a couple months. but then this happened

jean rip

These jeans became beyond repair, but I couldn’t bear to just toss them out with the garbage when they were in no shape to be donated.

So I did what any rational person would do.

I hoarded them for several months until I figured out what I could do with them.

Enter Madewell.

Madewell3

They have partnered with Blue Jeans Go Green to execute a pretty neat jean recycling program. Bring in ANY type of jean to one of their stores and they will help turn them into housing insulation.

Madewell2

So far, they have collected over 1 million pieces of denim and saved over 600 tons from going into the landfill.

Right now, Madewell is running The Denim Forever Tour, hosting pop-up recycling stations at locations all around the country.  So check out if they will be anywhere near you between now and October.

Below is what my hole-y jeans will become! Insulation to warm people’s houses.

madewell1

Just for dropping off your jeans, Madewell will provide a $20 coupon towards a new pair of their jeans.

Check out this cool video about the program.