DIY

A Secondhand Nursery

One thing I did not want to do once we transformed our guest room into a nursery was buy a whole bunch of new furniture.

The transformation process was pretty slow going because we had to move a ton of stuff out of the guest room to make way for baby.

We utilized Facebook Marketplace and Craigslist to sell a lot of the bigger items including the desk, some lamps, pillows, and other odds and ends. I also paid someone to recycle our mattress and box spring.

As things have left, we were able to start focusing on the items we needed and a lot of the main components of our nursery ended up being secondhand, coming from family members, strangers, flea markets, and online stores.

Here is how we ended up furnishing our nursery with pre-loved items:

The Crib

Our baby’s crib came from my cousin and it was previously another baby’s crib before that! Don’t worry. The issue with using a secondhand cribs is not knowing where the crib came from or if it’s super old with a drop down side. We know where it is from and no drop down side, so we are good to go!

IMG_20200520_093918

The Dresser/Changing Table

I scoured Facebook Marketplace and Craigslist for a vintage midcentury modern lowboy dresser to use as a changing table. The goal was to find a piece of furniture that could be used as a regular old dresser down the road and not look like a standard changing table. I ended up finding this one on Facebook Marketplace and am so happy with it!

IMG_20200520_095735

The Rocking Chair

This rocking chair was actually my mom’s and she rocked me in it as a baby. Growing up, the rocking chair was in our computer room and I spent many hours talking on the phone sitting in it. Now I get to rock my own baby in this chair!

Additionally, the original cushion on this chair definitely did not go with the nursery theme, but luckily my mother-in-law was able to reupholster it!

The tallboy dresser behind the rocking chair is also secondhand, but we have had it for a number of years and it was bought on Craigslist. Luckily it matches pretty well!

IMG_20200520_094019

The Clothes Tree

This kiddie sized clothes tree has also been around the block! It was originally in my mom’s bedroom as a child and eventually was in mine. It has been painted a number of times including yellow, pink, and now grey! It was already grey before we added it to the nursery, so we didn’t have to paint it again!

IMG_20200520_093947

The Vintage Posters

As for decor, our theme is loosely “vintage science classroom,” and these vintage science posters were the inspiration. I found these at the Grayslake Flea Market and bought them from a retired high school science teacher who taught in the 70’s.
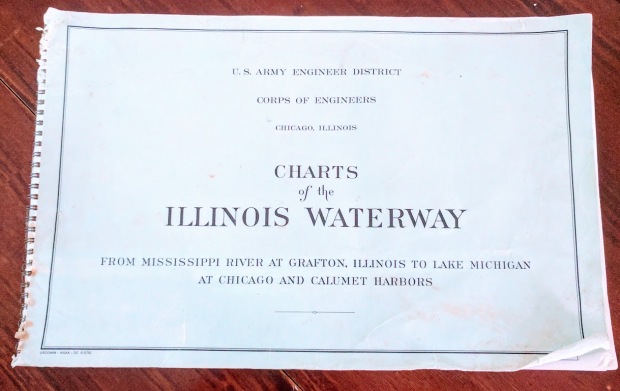
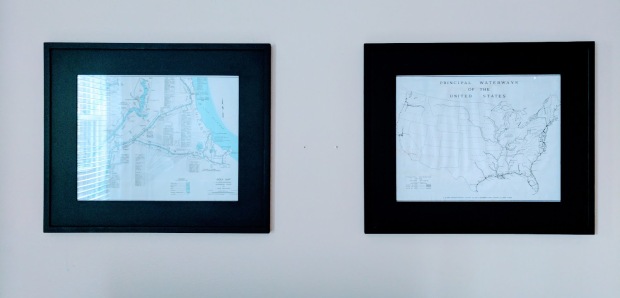
This slideshow requires JavaScript.

The Vintage Map

The pull down geographical classroom map was the second piece we collected in the theme from the Elkhorn Flea Market. It sat in our closet for a few years just waiting for a baby to come along.

IMG_20200520_095804

The Vintage Children’s Books and Microscope

To round out the theme, I found some smaller pieces for the tallboy dresser.

IMG_20200520_100229

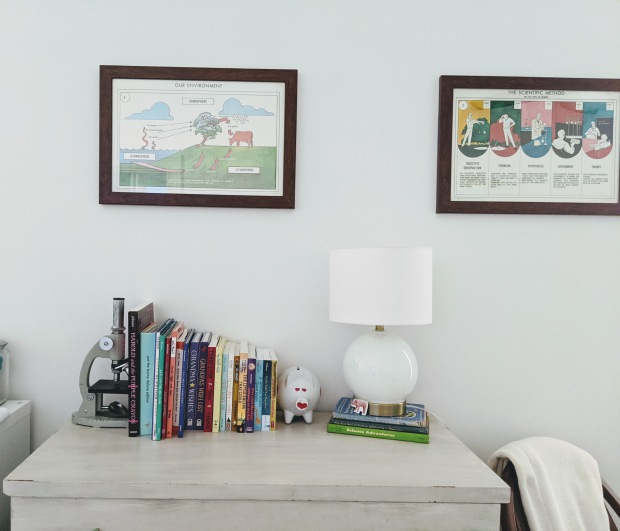
The vintage children science books are from the 50’s and 60’s and I found them on Etsy.

IMG_20200520_094037

Also from Etsy, I picked up a vintage microscope to use as a bookend.

IMG_20200520_100245

And there you have it! We do have another storage piece of furniture in the room with fabric bins (not pictured) and that came from Facebook Marketplace.

Otherwise, a majority of the rest of the items came from Target including both table lamps, the rug, side table, ottoman pouf and blackout curtains.

Not bad? I think we did a pretty good job of keeping it secondhand. What do you think?


An Attempt at Beeswax Wraps

Don’t worry. All my posts won’t be about pregnancy and babies from now on.

I finally found the energy and time to tackle a DIY I have been wanting to do. I own a couple pieces of beeswrap as a replacement for plastic cling wrap, but they have been around for a while and are starting to lose their ability to cling to a surface.

While at a craft fair back in November, there was a booth selling local honey and beeswax products, including a nice brick of beeswax.

IMG_20200119_171916

So I bought it, thinking I would try my hand at creating my own.

At first, I was going to run over to Michael’s or Jo-Anne Fabrics and pick up some fabric, but then I remembered The WasteShed here in Chicago. They sell repurposed arts and crafts materials! So I headed over there and scrounged through their fabric scrap bin, leaving with a bunch of options for the low, low price of $2.75.

IMG_20200119_172001

The directions I followed for these beeswax wraps came from Good Housekeeping. I was looking for a tutorial that was easy and did not involve a lot of weird ingredients. For instance, a couple required pine resin and some other stuff you have to find at a specialty store or order. Neah.

So here is what I did:

1.) Wash, Dry, and Iron Your Fabric

Good Housekeeping recommended using 100% cotton, which I was not able to know if I fully achieved since I bought fabric scraps, but I figured I would give it a shot and see what happened.

After washing and drying the fabric pieces, I ended up ironing them because some were pretty crumpled. Otherwise, I would not have done this step, I hate ironing…

2.) Cut Your Fabric

I used pinking shears to keep the ends from fraying, but I am sure you can hem them also. I didn’t really adhere to a specific size and just kind of eyeballed what looked good. You can definitely see that I cannot cut straight either!

3.) Grab A Baking Sheet and Parchment Paper

GH recommends placing the printed side of the fabric down.

IMG_20200119_171925

4.) Cover Fabric in Beeswax

This is where I started to stray from the GH directions because I did not buy beeswax pellets, which apparently are a thing. I had a brick of beeswax that needed to be grated, which took quite some effort and I would not recommend it.

So I grated and grated and grated for what felt like forever and covered the fabric.

IMG_20200119_172447

5.) Pop It in The Oven

It only takes about 4 minutes to melt and then you are supposed to brush the wax around on the fabric, but it seemed I did not use enough wax and there wasn’t any to spread. There also were a lot of spots where I could see that the wax was missing, including the edges.

So I tried again.

IMG_20200119_173917

This time I put my muscles to work and grated a more ample supply of beeswax and made sure to get up close to the edges. This seemed to work better this time around.

6.) Let It Dry

The fabric pieces were pretty cool to the touch once I took them out and tried to brush the wax around. I was able to pick them up and wave them around a bit to initially dry.

Afterwards, I folded the fabric over a wire hanger and hung it on the shower curtain rod to fully dry. This only took a few minutes.

7. Enjoy?

After grating enough wax for three wraps, I was pretty tired, so I decided to give it a break. I am also curious if these will work, so I didn’t want to spend all this time and effort making a bunch and it turns out they didn’t do anything.

They feel right and they look right, but I want to test them out for a bit.

IMG_20200120_085738

Hopefully, they do the job! I will keep you update.

Have you ever made DIY beeswax wraps? Any recommendations?

Growing Goodies on Our Balcony

On a dreary day in May (Chicago has had plenty of dreary spring days), I ventured out to the newly opened City Grange garden center to find what I could grow on my balcony.

When we moved into this apartment last summer, I did not make an attempt to grow anything beyond some flowers, but this year I wanted to try growing vegetables and herbs. Even after taking a small space gardening class at the Chicago Botanic Garden, I was not entirely sure where to start.

Luckily, City Grange is there to help people like me figure it all out. Unlike Home Depot or other garden centers where it is next to impossible to find an associate, and then an associate that actually knows what they are talking about, at City Grange I was immediately greeted and offered assistance. And boy did I need it!

I explained what kind of sun I get, what floor we are on, that we don’t have a hose, and how much space we actually have to grow. After some discussion I left with:

  • Romaine
  • Garlic Chives
  • Kale/Red Kale
  • Mint
  • Oregano
  • Cilantro
  • Sorrel
  • Calendula
  • Strawberry
  • Milkweed

Plants 5

I also left with potting mix, seaweed fertilizer, and probably the greatest find of all, a pig watering can.

Not all of my plants were meant for human eating. Milkweed is an important food source for monarch butterflies. I also planted the calendula 1. because they are pretty and 2. because I needed a cross pollinator for my strawberry plant.

My planting vessels ranged from one reused pot from last year, two new self-watering pots from Target, and an upcycled metal pot and basin I got at a garage sale for $3. I drilled some holes into the pot and basin and they were ready to go!

Plants 4

After some time, my little plant babies started to get acclimated to their new home and started growing big and strong (except for the garlic chives, they are not feeling it).

Plants 2

I got my first calendula flower, which looks like a little marigold and a bloom on my strawberry plant.

Plants 3

The cilantro, mint, and oregano have been prolific and I am often harvesting almost every week. I have been drying the oregano and also using it fresh.

plants 1

Almost two months later my plants have been doing amazing, except those darn garlic chives. I have had fresh romaine and sorrel salads, kale in my smoothies, and fresh cilantro on tacos!

This experience has been much better than when I tried to grow herbs from seeds. If you are in the Chicago area, I highly recommend checking out City Grange!

I Paid Someone To Fix The Hole in My Jeans

I have lofty goals sometimes and try to fix things that are in need of repair.

The key word is “try” because it is been proven that I am not a skilled seamstress as outlined in this past post. Luckily, I received a basic sewing machine class for Christmas and am on my way to improving my sewing skills a bit.

My attempt to patch the hole in my jeans failed miserably and I ended up hoarding that pair until I could turn them into housing insulation.

Since then, I recently had an older pair of jeans rip a hole in the crotch while I was doing an impersonation of an Olympic curler (yes, you read that right). As I glided into a deep lunge, I immediately knew my pants were done for.

But like last time, I held on to this pair because I knew there was a way to bring them back to life even if it wasn’t fixed by me.

A couple of weeks later, while walking down the street, I noticed a storefront that advertised denim repair and thought I would give it a shot. So I brought them over to Mildblend Supply Co, paid $25, and a week later had fully repaired jeans.

fixed jeans

Where is the fixed hole? It is hard to tell!

Twenty-five dollars seems like a lot for just fixing a hole, but its cheaper than buying a new pair of quality jeans.

According to the employee who was sifting through all the repaired jeans to find mine, their store is one of the only ones in the Midwest that has a darning machine (check it out on their Instagram). They did an amazing job. Can you even tell where they fixed it?!

Given that the probability of me ripping my jeans is pretty high, I foresee going back there again.

In Chicago and have hole-y jeans (that aren’t supposed to have holes, not those trendy ripped ones)? Then check them out!


A Table Fit for Four

It has been a bit of process getting our kitchen table. At first, we were going to go secondhand, but as with shopping secondhand, what you are specifically looking for is not always available at the time you want it.

So, then we decided to just design our table instead. With my dad having the access and the know-how on woodworking we sent him a picture of what we were looking for and the custom dimensions we wanted for our small space.

And then we waited.

Months later (he’s a busy guy!) our table started to come together.

dining table

With every new picture update, we got even more excited!

dining table2

Before we knew it, K and my dad were finagling it up the stairs to our apartment.

And BAM!

We suddenly had a real kitchen table.

That more than two people could sit at.

chairs2

It is glorious and more beautiful than anything we would have ever bought in a store (and way better because I get to say my dad made it).

We are so cautious with it now, whereas with the old table we just threw whatever on it. Now everything must be gingerly placed on a placement or coaster.

At the time we received the table, we only had the 2 IU library chairs to sit on, so instantly inviting people over was not an option. Luckily, I had perused Craigslist the night before and inquired about a set of West Elm chairs that I have been pining over for ages. Each of those chairs retail for $249 A PIECE!

Thank goodness I acted quickly and followed up that I could pick them up the next day because I got all 5 chairs for $200 total!

chairs

Within two days we went from tiny garage sale table that fits two to the amazing custom table and bargain chairs that fit four (actually 5 but we cant fit that chair anywhere right now).

Come on over for dinner!

It is finally starting to feel like fall.

Finally.

It has been a bit too warm for a bit too long (climate change cough cough).

Now that there is a chill in the air, I can finally fully embrace it.

When the stores become inundated with “Happy Fall Ya’ll” pillows and pumpkin spice candles in August, it can be hard not to go overboard.

I have been trying to keep decorations to a minimum and keep them secondhand, handmade, or natural.

pumpkins7

Both of these pumpkins came from garage sales.

pumpkins6

Last year I knit this fall themed banner with leftover yarn.

fall banner

Halloween can also be celebrated without having to purchase a brand new costume each year. In college, I went as a Jedi solely from stuff I found at Goodwill.

halloween1

So go enjoy the season, but do it wisely!


Garage Sale Finds into Framed Art

K & I have a small obsession with maps.

We already have a map of Cape Cod Bay and Washington DC in our apartment.

So when I stumbled upon a copy of the Charts of the Illinois Waterway at a garage sale, I knew I had to go back and get it. K also told me I had to go back and get it.

garage sale1

It has maps of the Mississippi, the Chicago River, the lock system, and the canals that helped reverse the flow of the Chicago River.

K was thrilled with the purchase. We knew right away they would make great additions to our growing map collection.

The maps hung around for a few months until I finally got around to finding frames for them, even though we did not have much wall space left anymore.

framedmap1

We picked our favorite two: one of the waterways of the U.S. and one of the downtown portion of the Chicago River.

framedmap2

They look pretty good over the TV and am happy with the purchase and placement of them. It is also always a way better story when you can say you got something at a garage sale!

framedmap3

Who Needs Cotton Balls?

I have not bought cotton balls in AGES.


cotton rounds2

My cotton ball replacements.


From Friday’s post, you know that I have not been buying Ziploc bags because I have a solid replacement for them, but a replacement for cotton balls was not something I had found yet.

For a while, I just stole cotton balls from my parents, the bags just seemed to last forever. But now I do not even bother.

I never used cotton balls to take off makeup. Instead, I just used a washcloth. The only thing I really used them for was to remove nail polish, which I now just use some toilet paper for. It definitely was not efficient, but it got the job done when necessary.

Now that I am wiser, I know there are replacements for cotton balls and those are just reusable cotton rounds! They are basically two pieces of cotton fabric sewn together. cotton rounds

Currently, I do not own a sewing machine, so making my own was a bit more of an arduous option. So instead, I purchased them from a local business, WholeLoveOrganics. I currently use their deodorant too.

After using the cotton rounds, I toss them in a laundry bag for delicates (so I don’t lose them in the washing machine) and then wash and dry as normal.

Reusable and washable anything is pretty awesome, and I love that I have added these to my routine. They require basically zero effort and I will basically never buy cotton balls again, not that I have been recently!


Sunday at Randolph Street Market

Yesterday was a glorious day here in Chicago. It was sunny with some fluffy clouds and not stifling hot.

All I wanted to do was spend time outside so after a morning bike ride on the Lakefront Trail, I hopped over to Randolph Street Market to check out the vintage goods.

RSM5

I am always on the hunt for something unique and vintage, so much so that I made up a schedule for vintage shopping. Just like my love for Craigslist, I am fascinated by the fact that you never know what you are going to find.

RSM7

I did not end up buying anything, which is totally fine. Making a purchase is not in any way mandatory. You have to make sure you are going to LOVE what you buy.

RSM8

Even though I did not come across anything that had to come home with me (or anything would actually fit in our place), I enjoyed getting to browse what was available.

RSM9

There was definitely plenty of reuse, upcycling, and vintage charm to go around.

RSM1

On the other hand, there was also some really good quality midcentury modern pieces available.

RSM4

If you visit Randolph Street Market, there are vendors inside as well as outside! When colder weather rolls around, you can still shop the market from October through December.

RSM6

I did absolutely love these outdoor chairs! Aren’t they so clean and neat? Unfortunately, I have no outdoor space, so nowhere for them to go. I am sure someone else will love them just as much as I did and will be able to take them home.

RSM3

How did you spend your gorgeous Sunday?

Passing on A Traditional Florist

I like flowers.

I really do, but spending a fortune on plants that are flown in from far away and most likely going to be discarded the next day is just not my cup of tea.

So I made the easy decision that a traditional florist is not the route I will be going for my wedding.

Luckily we have a family friend who started Avium Flowers, providing fresh-cut flowers grown right here in Chicago in a sustainable and organic manner.

avium flowers

Right now I am working with them on the flowers and colors that I like. When the time comes, they can then order the appropriate seeds and specifically keep me in mind for the next growing season.

My wedding flowers are legitimately being grown just for me, right here in Chicago.

Seriously, how cool is that?

See some of their amazing work below.