DIY

An Attempt at Beeswax Wraps

Don’t worry. All my posts won’t be about pregnancy and babies from now on.

I finally found the energy and time to tackle a DIY I have been wanting to do. I own a couple pieces of beeswrap as a replacement for plastic cling wrap, but they have been around for a while and are starting to lose their ability to cling to a surface.

While at a craft fair back in November, there was a booth selling local honey and beeswax products, including a nice brick of beeswax.

IMG_20200119_171916

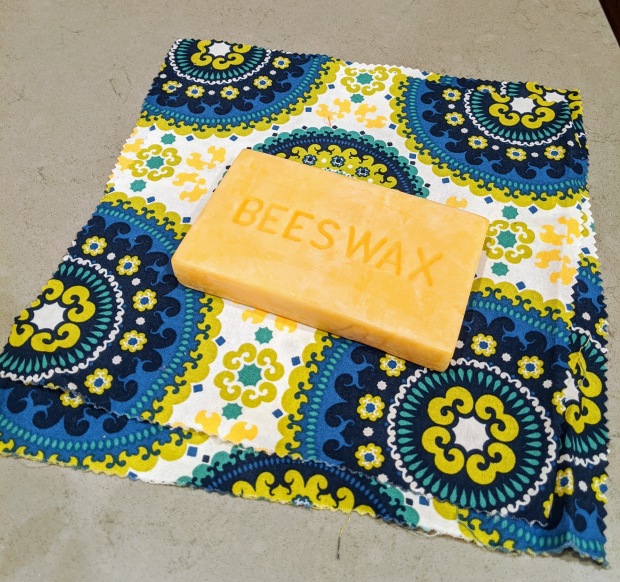
So I bought it, thinking I would try my hand at creating my own.

At first, I was going to run over to Michael’s or Jo-Anne Fabrics and pick up some fabric, but then I remembered The WasteShed here in Chicago. They sell repurposed arts and crafts materials! So I headed over there and scrounged through their fabric scrap bin, leaving with a bunch of options for the low, low price of $2.75.

IMG_20200119_172001

The directions I followed for these beeswax wraps came from Good Housekeeping. I was looking for a tutorial that was easy and did not involve a lot of weird ingredients. For instance, a couple required pine resin and some other stuff you have to find at a specialty store or order. Neah.

So here is what I did:

1.) Wash, Dry, and Iron Your Fabric

Good Housekeeping recommended using 100% cotton, which I was not able to know if I fully achieved since I bought fabric scraps, but I figured I would give it a shot and see what happened.

After washing and drying the fabric pieces, I ended up ironing them because some were pretty crumpled. Otherwise, I would not have done this step, I hate ironing…

2.) Cut Your Fabric

I used pinking shears to keep the ends from fraying, but I am sure you can hem them also. I didn’t really adhere to a specific size and just kind of eyeballed what looked good. You can definitely see that I cannot cut straight either!

3.) Grab A Baking Sheet and Parchment Paper

GH recommends placing the printed side of the fabric down.

IMG_20200119_171925

4.) Cover Fabric in Beeswax

This is where I started to stray from the GH directions because I did not buy beeswax pellets, which apparently are a thing. I had a brick of beeswax that needed to be grated, which took quite some effort and I would not recommend it.

So I grated and grated and grated for what felt like forever and covered the fabric.

IMG_20200119_172447

5.) Pop It in The Oven

It only takes about 4 minutes to melt and then you are supposed to brush the wax around on the fabric, but it seemed I did not use enough wax and there wasn’t any to spread. There also were a lot of spots where I could see that the wax was missing, including the edges.

So I tried again.

IMG_20200119_173917

This time I put my muscles to work and grated a more ample supply of beeswax and made sure to get up close to the edges. This seemed to work better this time around.

6.) Let It Dry

The fabric pieces were pretty cool to the touch once I took them out and tried to brush the wax around. I was able to pick them up and wave them around a bit to initially dry.

Afterwards, I folded the fabric over a wire hanger and hung it on the shower curtain rod to fully dry. This only took a few minutes.

7. Enjoy?

After grating enough wax for three wraps, I was pretty tired, so I decided to give it a break. I am also curious if these will work, so I didn’t want to spend all this time and effort making a bunch and it turns out they didn’t do anything.

They feel right and they look right, but I want to test them out for a bit.

IMG_20200120_085738

Hopefully, they do the job! I will keep you update.

Have you ever made DIY beeswax wraps? Any recommendations?

I Paid Someone To Fix The Hole in My Jeans

I have lofty goals sometimes and try to fix things that are in need of repair.

The key word is “try” because it is been proven that I am not a skilled seamstress as outlined in this past post. Luckily, I received a basic sewing machine class for Christmas and am on my way to improving my sewing skills a bit.

My attempt to patch the hole in my jeans failed miserably and I ended up hoarding that pair until I could turn them into housing insulation.

Since then, I recently had an older pair of jeans rip a hole in the crotch while I was doing an impersonation of an Olympic curler (yes, you read that right). As I glided into a deep lunge, I immediately knew my pants were done for.

But like last time, I held on to this pair because I knew there was a way to bring them back to life even if it wasn’t fixed by me.

A couple of weeks later, while walking down the street, I noticed a storefront that advertised denim repair and thought I would give it a shot. So I brought them over to Mildblend Supply Co, paid $25, and a week later had fully repaired jeans.

fixed jeans

Where is the fixed hole? It is hard to tell!

Twenty-five dollars seems like a lot for just fixing a hole, but its cheaper than buying a new pair of quality jeans.

According to the employee who was sifting through all the repaired jeans to find mine, their store is one of the only ones in the Midwest that has a darning machine (check it out on their Instagram). They did an amazing job. Can you even tell where they fixed it?!

Given that the probability of me ripping my jeans is pretty high, I foresee going back there again.

In Chicago and have hole-y jeans (that aren’t supposed to have holes, not those trendy ripped ones)? Then check them out!


New Homes for Old Pillows Hard to Come By

Being that our household includes two later twenty-somethings who still have a lot of things from college and from our parents, we have acquired some items from family members that have an unidentifiable and questionable age.

While there is nothing wrong with that for pots/pans, or baking sheets, it’s helpful to know how long someone had been sleeping on that pillow you found in the closet at your parents.

I was recently waking up with a sore neck, which I attributed to my pillow. So for Christmas, I was given a new one (#adultstatus).

But now I have an old pillow that I don’t know what to do with.

We already have at least 2 extra pillows lying around for when the occasional guest stays over, and we don’t have the room to be piling up pillows.

I am not going to make it into a dog bed (don’t have a dog), or craft it into throw pillows (no room for those), and donation centers don’t take used pillows.

So what is a person supposed to do?

I wanted the pillow to avoid a landfill end and was intrigued by it keeping a shelter pet nice and cozy. So, I checked almost every Chicago animal shelter’s website to see if they were accepting old pillows.

None of them do, but many took sheets, blankets, towels, and comforters, which is very good to know since we will be getting all new versions of those when K and I get married.

Here are the Chicago animal shelters that take various old textiles, but not pillows:

So I have a home for all of that stuff, but not my delipidated pillow. Now what?

Since we don’t have a lot of seating in our place, I am thinking that I might get some fabric and make a nice floor pillow with the stuffing like this one here.

Otherwise, there are plenty of other options for what to do with sad pillows:

My Xmas Gifts Were (Mostly) Made in Chicago

I haven’t been to the mall for any of my Christmas shopping (I did purchase a few things on Amazon though, not going to lie).

Actually, most of it got done at the Chicago Plumbers Hall…

…which is where the Made in Chicago Market is held.

made in chicago market2

Everything there was handmade in Chicago, so it made picking out gifts super easy because I knew where they were coming from. They were not shipped over from China. They were painstakingly made by hand by artisans in my own city.

Made in chicago market1

After an initial lap, I started to formulate gift ideas in my head. Of course, I cannot discuss any of my purchases here because some of my most dedicated readers are the recipients!

This season, not only did I find unique items, but my purchases helped an individual maybe make ends meet, or provided the capital for improvements to their business.

It is a win-win situation.

If you missed the Made in Chicago market, there are still plenty of Chicago holiday markets running from now until Christmas. Which ones will you go to?

The 5 R’s

Back in the day, it was just the 3 R’s: reduce, reuse, recycle.

3 r's

I know this because I did a science project about it in 6th grade and decorated it with puffy paint.

But since then, 2 new R’s have been added to the spectrum: refuse and rot.

There are other R’s that people add such as repair and repurpose, but I kinda lump those under reuse, so I am going to leave those out for now.

The best way to visualize the 5’s is in an inverted pyramid, with our biggest, most common actions on top, leading down to what we should be doing the least at the very bottom.

So at the top of this inverted pyramid, we have our number one way to avoid waste and that is Refuse. Saying no is the number one way to keep stuff out of the landfill. I talked about this recently in my 10 Most Overlooked Ways to Reduce Waste post. Saying no keeps those items from entering our lives in the first place, be they straws, food packaged in plastic, or freebies. Collectively saying no, and therefore decreasing demand, also can spur change.

After we have refused all the bad stuff (excessive packaging, food that’s grown far away, etc.) it is time to focus on what we do have and use, and then Reduce it. Don’t go out to eat for lunch every day or cut back on buying new clothes.

Now we have a curated list of items that we own and use. Sometimes those items will break, need some fixing or their original purpose becomes unnecessary. This is where Reuse (and repair and repurpose) comes it. Turn that old dresser into a jazzed up TV stand. Unleash your inner DIY goddess.

Now we get into the last resort part of the pyramid. If we cannot Refuse, Reduce, or Reduce something, then the next place it should head is into your compost bin to Rot.

Who knew that many years after middle school I actually would be composting!

Pictures

But plastic is not compostable, so any milk jugs and glass bottles (that you have not already refused and reused) should then be Recycled. Notice that recycling is pretty far down the list.

It definitely is not as far as the very last option of the Landfill, the place where your trash goes on to live forever. I love when trash cans are labeled with “landfill.” It helps you think before you toss that your gum wrapper is going to head to a giant hole in the ground and not to this fantasy land of “away.”


What is in a landfill?

Not sure this information is accurate anymore…


And that’s the 5 R’s (+ Landfill)! Here is an example of one piece, say a magazine, going through each step of the pyramid.

  • Refuse: You are offered a free magazine subscription that you politely decline
  • Reduce: You still love reading physical magazines (and if you do, that is great! You do you!) so you cut back on how many you subscribe to and get the rest online.
  • Reuse: After reading the magazine, you cut out the pages to decoupage a DIY project or use the pages as padding material for your Christmas ornaments.
  • Rot: When your done with your DIY projects, you add it to your compost pile or bucket
  • Recycle: If you don’t have access to composting, you toss the magazine in the recycling bin.
  • Landfill: If you don’t do any of the above things…


Thanks A Bunch

Most of the time it is other people that get in the way of and inhibit living a life with less waste.

BUT there are also the people who encourage you, listen when you are rambling about compost or send you articles they think you’d find interesting.

So in honor of Thanksgiving, I want to thank all those encouragers and listeners in my life.

Thank You.png

Thank you to my Mom for being an avid reader, always liking my Facebook posts, and being interested in what I am writing. I will forgive you for brushing it off every time I tell you that I am going to build you a compost bin in your backyard.

Thank you to my Dad who has contributed to a lot of my DIY  projects when I need help or materials.

Thank you to my Aunt MM who replies to my posts with great enthusiasm about how she is making changes or how she has been using cloth napkins for ages! Also for teaching me about haggling and getting a great deal at garage sales. Some of our recent purchases together are below:

Thank you to my friend Julie for calling me the other day to tell me she was going to purchase non-toxic nail polish and for sending me new blog ideas.

Thank you to my friend Britni and her husband Eric for appeasing me on a ski trip by picking up trash and always holding myself accountable.

Thank you to my friend Nina for starting her own compost bin in her backyard.

Thank you to K’s friends who read the blog specifically to make fun of K for composting. You’re still talking about composting and I call that a win!

A huge thank you to all my other friends, family, and readers who have sent me articles, comments on my posts, shared a story with me or told me how much you like reading my blog.


Thank You!!!


It is finally starting to feel like fall.

Finally.

It has been a bit too warm for a bit too long (climate change cough cough).

Now that there is a chill in the air, I can finally fully embrace it.

When the stores become inundated with “Happy Fall Ya’ll” pillows and pumpkin spice candles in August, it can be hard not to go overboard.

I have been trying to keep decorations to a minimum and keep them secondhand, handmade, or natural.

pumpkins7

Both of these pumpkins came from garage sales.

pumpkins6

Last year I knit this fall themed banner with leftover yarn.

fall banner

Halloween can also be celebrated without having to purchase a brand new costume each year. In college, I went as a Jedi solely from stuff I found at Goodwill.

halloween1

So go enjoy the season, but do it wisely!


Who Needs Cotton Balls?

I have not bought cotton balls in AGES.


cotton rounds2

My cotton ball replacements.


From Friday’s post, you know that I have not been buying Ziploc bags because I have a solid replacement for them, but a replacement for cotton balls was not something I had found yet.

For a while, I just stole cotton balls from my parents, the bags just seemed to last forever. But now I do not even bother.

I never used cotton balls to take off makeup. Instead, I just used a washcloth. The only thing I really used them for was to remove nail polish, which I now just use some toilet paper for. It definitely was not efficient, but it got the job done when necessary.

Now that I am wiser, I know there are replacements for cotton balls and those are just reusable cotton rounds! They are basically two pieces of cotton fabric sewn together. cotton rounds

Currently, I do not own a sewing machine, so making my own was a bit more of an arduous option. So instead, I purchased them from a local business, WholeLoveOrganics. I currently use their deodorant too.

After using the cotton rounds, I toss them in a laundry bag for delicates (so I don’t lose them in the washing machine) and then wash and dry as normal.

Reusable and washable anything is pretty awesome, and I love that I have added these to my routine. They require basically zero effort and I will basically never buy cotton balls again, not that I have been recently!


We Broke Our Microwave and Never Fixed It

Usually, I am always in the pro-fix-whatever-is-broken camp, but in this particular case, I am not so sure.

A month or so ago, we had an incident with the microwave…

kitchen3

Since we have a tiny kitchen, we have an abnormally tiny microwave. Basically, a heating pad was in there and couldn’t fully spin around, leaving it stuck against the microwave’s wall. That caused a bit of a sparking and singeing episode and the microwave has not been used since.

To avoid any accidental and habitual use, I just unplugged it. At first, it was quite annoying since I was so used to checking the time on it, even though there is a clock right on the wall.

microwave

My morning oatmeal used to be ready in 2 minutes and re-heated dinner was just a few minutes away. Ok, I don’t need to explain to you how a microwave works…

Anyway, now everything gets heated up in the oven or on the stove. I used to grumble about it, but really it doesn’t take that much longer. If I know I need to heat up leftovers in the oven, I just need to remember to turn it on a bit beforehand.

Overall, the re-heating process of any food does not take any more than 15 minutes, but it does create some extra dishes…

Should we even try to fix it? Or just go with the flow of no microwave?


Jean Repair Attempt Failed

I have known for a while that my attempt at patching my jeans was failing, and yesterday they finally bite the dust.

jean rip

There is no saving these babies at this point, but since it is about to be short season, this is something I will probably put off until fall.

Have you made an attempt to repair something, but were met with utter failure?

At least I tried. I got another good 4 months out of my favorite jeans.